

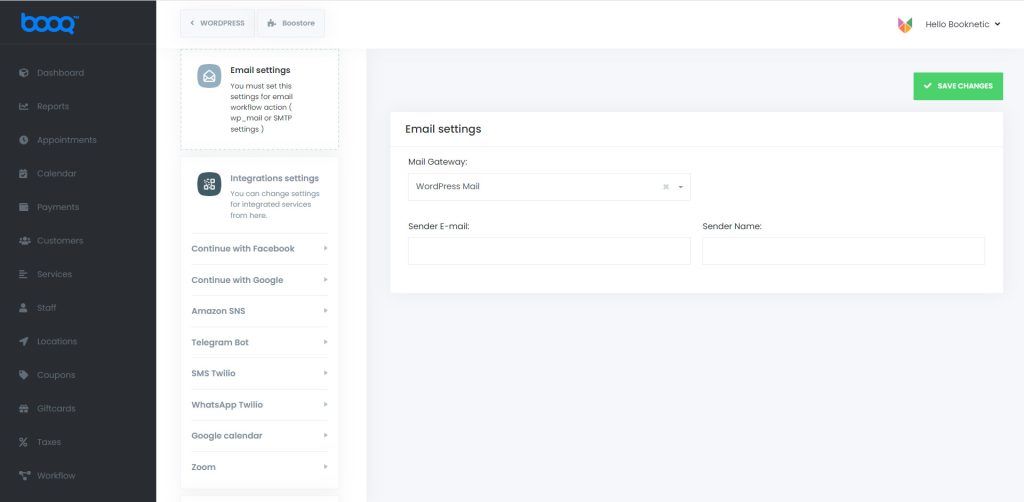
In order for email notifications to work properly, you must first set notifications up correctly.
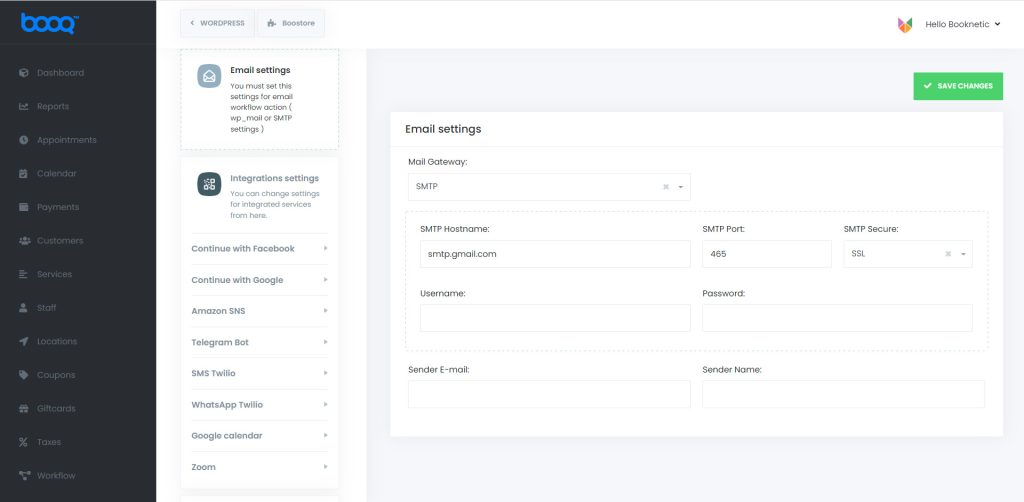
Two methods are used for sending email notifications: WordPress Mail and SMTP.
The most preferred of these is WordPress Mail because there is no need to make any settings. If you just add yourmail@yoursite.com to the email section, it will work without any problems. This method cannot be used on servers that do not support PHP Mail.
The other method is SMTP. BOOQ BLUE™ SMTP for sending emails. If you type in your own SMTP information, emails will be sent via your SMTP.
How to set up Gmail SMTP?
Most people prefer to use SMTP to send their emails. Because in shared hosting, the email services of the servers are not very useful. With the removal of Google’s “Less secure apps” permission, Gmail SMTP usage can only work through the API. In this tutorial, we will show you how to make Gmail SMTP compatible with BOOQ BLUE™.
- Go to Google Console and create a new project.
- It may take a few seconds to create the project. After the project is created, select the project by clicking the “Select project” button.
- Select Library from APIs & Services section in the menu.
- Search for Gmail API and Enable
- Then navigate to the OAuth consent screen
- Select External as the User type and click the Create button.
- You can write anything you want in the app information section.
- Do not forget to switch the Publishing status from Testing to In production.
- Now as you have completed the above process, we can create credentials. After clicking Create Credentials in the Credentials section, select OAuth client ID
- In this section, you need to choose Web Application as the Application type.
- In the Authorized redirect URI part, we need to write the redirect URI of the service where we will include our SMTP information.
- After you set the redirect URI properly on the Google Console, click on the SAVE SETTINGS in the further steps.
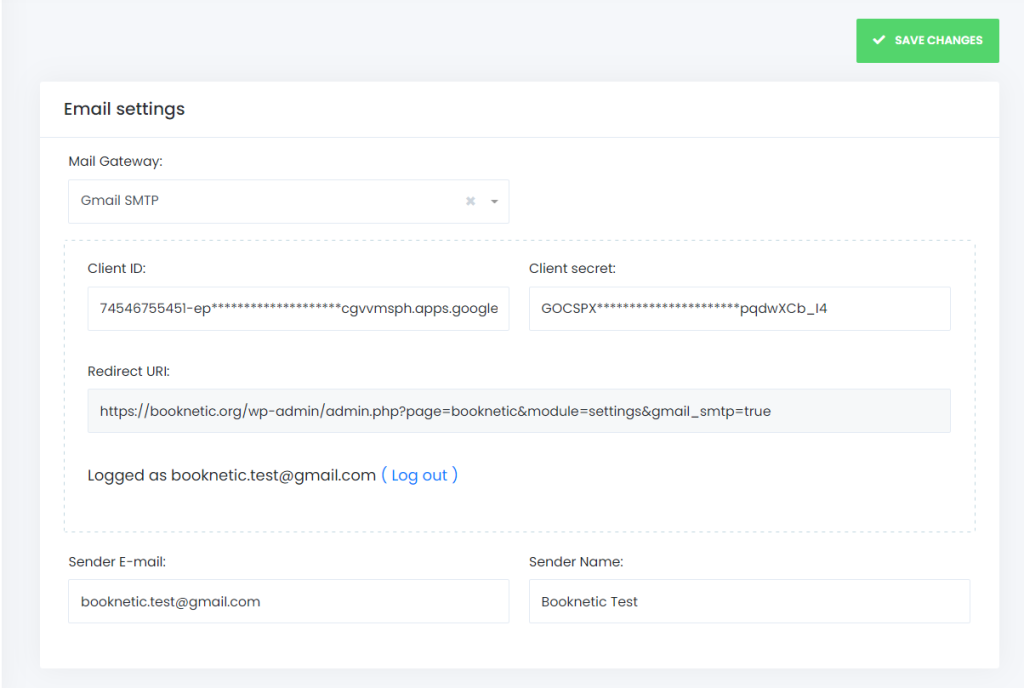
- Now the credentials are ready! You can now connect your Gmail to send emails over the Gmail SMTP. Copy the API Credentials.
- Paste your API credentials on the plugin and click on the Authorize button.
- Sign in with your Google account which is you want to send your emails.
- Since the APP you created is not verified by Google yet, you need to click on the “Show advanced” and then “Go to booq.blue (unsafe)” button to log in to the Google account via your created APP.
- Click on the Continue button and allow the APP to send emails over your account.
- Now everything is ready! You can send your Booknetic email notifications by using the Gmail SMTP. Put yourGmail address as a Sender E-mail. Booknetic notifications will be sent over the Gmail SMTP.
Why can’t BOOQ BLUE™ send emails?
If your email notifications are not working and you didn’t receive emails while sending a test email, you need to check the following possibilities.
- You have selected the WordPress Mail method, but the sender email address you have written does not contain the domain name. (Which domain you are using the plugin in, you need to write that domain name as sender email.)
- You have selected the WordPress Mail method, you have typed sender email correctly, but your hosting provider does not have a PHP Mail feature, or your hosting plan does not have this feature.
- You have selected the SMTP method, but you incorrectly set the SMTP settings.
- You have selected the SMTP method, your settings are correct, but your hosting provider does not support SMTP.
- You have selected the SMTP method, but your hosting only allows its own SMTP server. (At the same time, some hosting providers may not support Google SMTP.)