

You can 2-way sync your BOOQ BLUE™ calendar with Google Calendar with BOOQ BLUE™:
Your customer’s bookings will automatically appear in Google Calendar, and the Google Calendar events will appear on BOOQ BLUE™ Calendar.
Days and hours you select as busy in the Google calendar will be perceived as busy in the BOOQ BLUE™ calendar, and your customers can’t book in those days and hours.
Each of your staff can connect his(her) Google Calendar to the plugin individually.
To synchronize your Google Calendar, you must first enable it in settings.
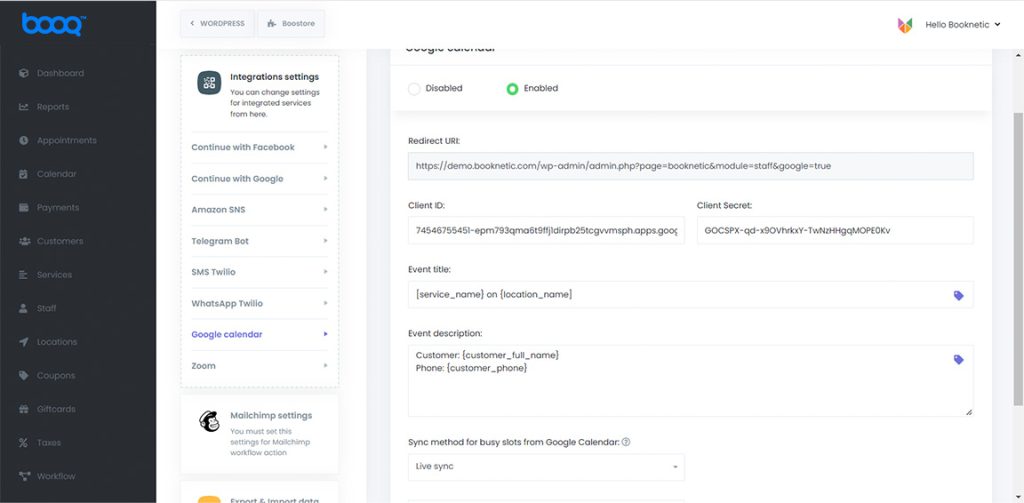
- To do this, go to Settings > Integrations settings > Google Calendar:
- In the second step, we need to access the Google API to work with Google Calendar. To do this, follow the steps below:
- Go to your Google Developer Console by signing in to your Google account ( https://console.developers.google.com ):
- Click the “Select a project” button in the upper-left corner and click the NEW PROJECT button in the opened modal:
- Write BOOQ BLUE™ in Project name and keep the location-name No organization as default. Click the “Create” button.
- You will see the project creation process in notifications, and you will get a notification when the project is ready. You will enter the dashboard by clicking on the notification.
- When your dashboard is opened, click on the menu icon in the upper left corner. Go to the “APIs & Services”> “OAuth consent screen” menu in the popup menu.
- In the opened form, click External and click on CREATE button.
- Enter the name of your application in the opened form. Enter your domain name (single domain name) in the “Authorized domains” entry and click the Save button.
- Save all steps and finish the registration on the OAuth consent screen. Then, change the Publishing status from Testing to In production.
- Enter the Library menu from the left menu:
- Search the “Google Calendar API” in the opened library page and select the Google Calendar API from the result. Enable the Google Calendar API:
- Then, select the Credentials from the left side menu, click on the “CREATE CREDENTIALS” and select “OAuth client ID”:
- Choose the “Web Application” in the “Application type” field. Put the redirect URI, which can be copied from Settings > Integrations > Google Calendar > Redirect URI:
- Now the integration is ready! You can copy the API Credentials and put them on the proper fields on BOOQ BLUE™.
- Navigate to Settings > Integrations > Google Calendar and paste the API credentials on there.
- And save the settings.
Now is the time to keep track of your staff and Google Calendar. - To do this, go to the Staff tab and edit the Staff which you want to connect to Google Calendar with the choice from the list. Click the “GOOGLE SIGN IN” button below:
- You will be linked to the Sign-in window from Google. When you try to access your account and log in, you will receive a warning message just like the background. Click “Advanced” here and click on the “Go to booknetic.com (unsafe)” link:
The reason for this warning is that you didn’t send the application created by the instructions above to the Google review. You do not need to send the Application for review until you use this Application only for you and your staff. Because this review process is a long process, and Google’s approval of your Application takes 4-6 weeks. You don’t need to go through this timeline. Just inform your staff that there is no compatibility with clicking “Go to booknetic.com (unsafe)” because the Approved Application is your own personalized Application. - You will redirect to BOOQ BLUE™ – Edit page of staff again. In the popup window, select the “Google calendar” option, click on the email you allow, and click the save
- That’s it. Now connections between your staff and Google Calendar are provided.