

BOOQ BLUE™ supports multi-staff. You can add your Staff from different locations to the system.
Let’s start with adding a new Staff.
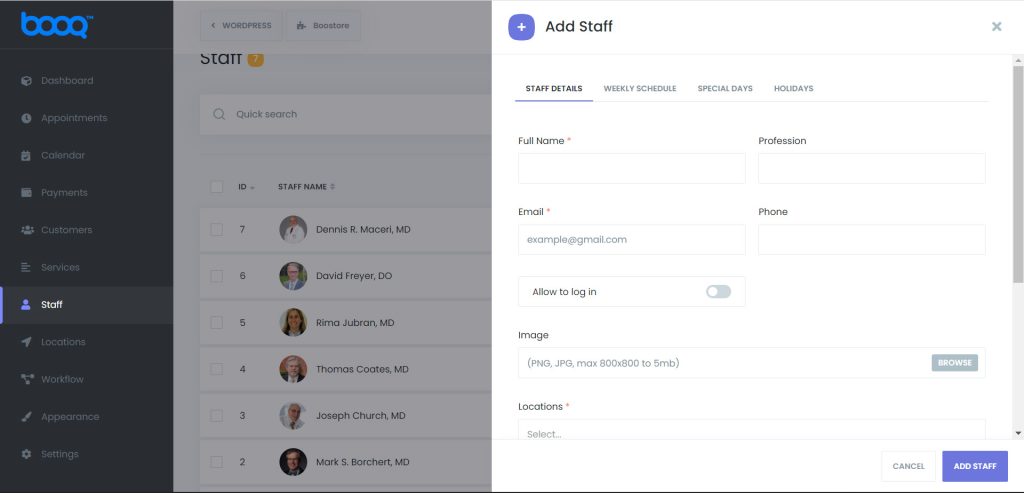
Click on ADD STAFF to add new Staff. You’ll see four tabs in the opening window:
- DETAILS
- WEEKLY SCHEDULE
- SPECIAL DAYS
- HOLIDAYS
In the DETAILS tab, we will enter basic information about Staff. We will select the name, email, phone number, and profile picture of the Staff. The profile photo and name of the Staff will be visible in the booking process. Then we will select the location of Staff. If Staff works on several locations simultaneously, you can select all locations here with multi-select options.
You can also include a short note about Staff. This note will not be visible to the customers.
By default, the Staff working hours are as configured in the settings. If you want to create a custom timetable for your Staff, you must first enable the “Configure specific timesheet” checkbox in the WEEKLY SCHEDULE tab. You can build a special weekly work schedule for Staff. Here you can add Staff’s non-working days, work hours, and breaks. You can also set up each day of the week. You mark the start and end times of each workday. If a certain day of the week is outside of your Staff’s working days, you can set this day as Day-off. If you want to add the break time, click on Add break button and save the start and end times of the break. You have the opportunity to add endless hours of breaks for each day of the week.
In the SPECIAL DAYS tab, you can set up a timesheet on special days for Staff. If a staff member is allowed to work any day that is a non-working day for the Business or can only work on the second half of the day, you can set it here. Just click on the “Add special day” button and set the start and end hours in the opening panel. If needed, you can also click on the “Add break” button for special days to add break times.
If it’s needed to delete special days you added, click on the Remove special day button.
In the HOLIDAYS tab, you can set specific holidays for Staff. If Staff won’t work any day, it’s enough to click that day from the calendar in this tab. Let’s say that you are already setting the general holidays for your business in Settings > Holidays. If you want to appoint additional holidays for your current Staff, please note them in this tab. Otherwise, it’ll be preferable to select the same holidays in both Staff and Settings.
After completing all information about Staff, you can save the content by clicking on the ADD STAFF button. You can search the name, email, phone numbers of Staff on the list. And you can also sort by name, email, and phone number with ASC or DESC. If you intend to change the staff information, click the Edit button.
You can delete Staff individually or as a group. If only one Staff needs to be deleted, click the three-dot and then the Delete button. If you want to delete some Staff in bulk, check the checkboxes in front of the Staff names and click on the Delete icon which will open below.